
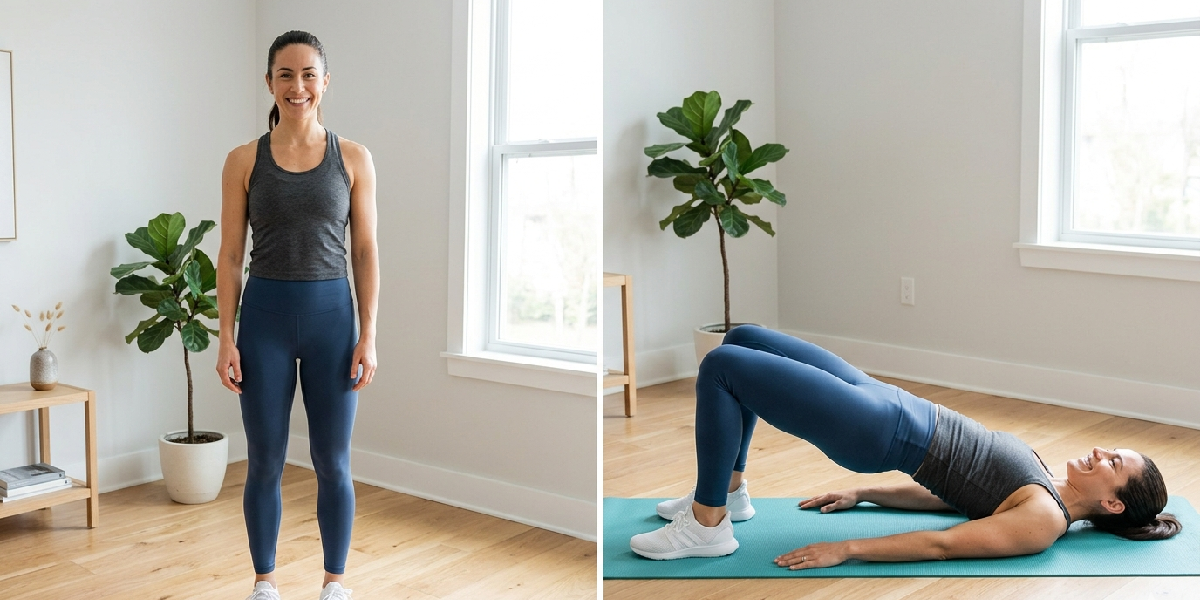
The bridge exercise is one of the most effective and accessible movements you can add to your fitness routine. Whether you are a beginner just starting out or an experienced athlete looking to reinforce foundational strength, mastering the bridge exercise gives you a powerful tool for building a stronger core and more powerful glutes without any equipment.
In this guide, you will find everything you need to perform the bridge correctly, progress safely, and get real, lasting results.
What Is the Bridge Exercise?
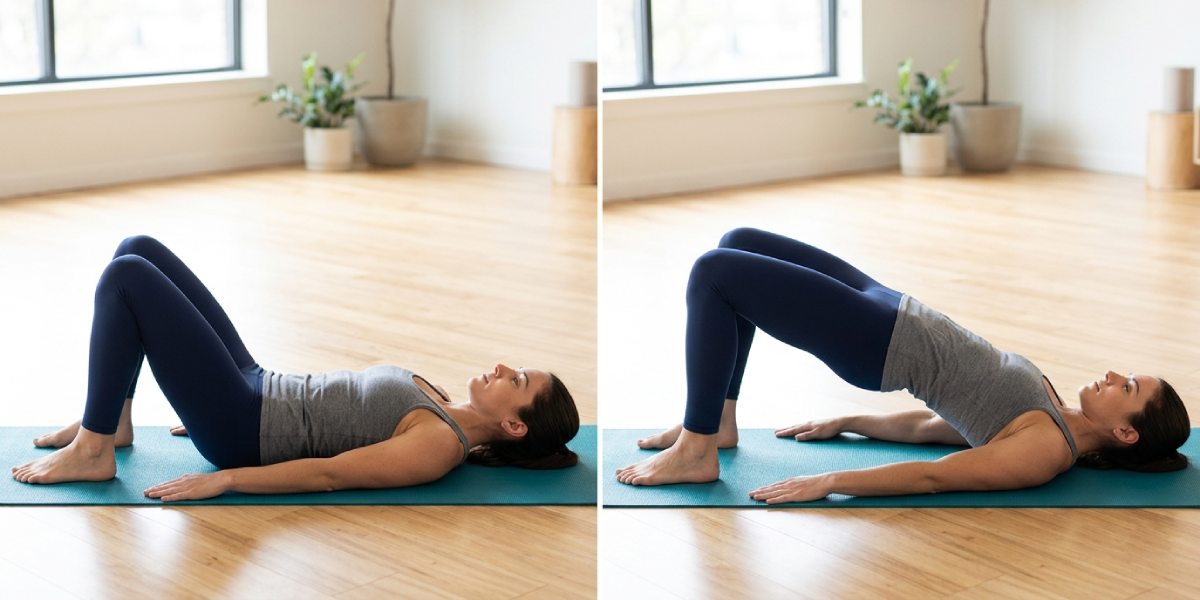
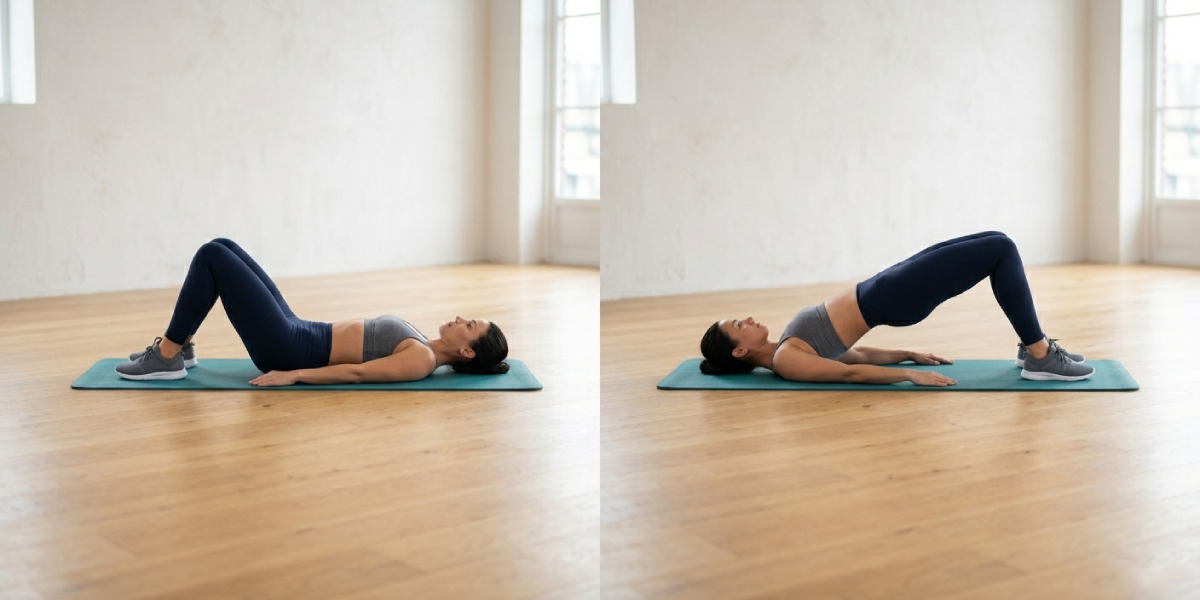
The bridge exercise, sometimes called the glute bridge, is a floor-based movement in which you lie on your back with your knees bent and feet flat on the ground, then drive your hips upward by engaging your glutes and core. At the top of the movement, your body forms a straight diagonal line from your knees to your shoulders, which is where the exercise gets its name.
Unlike many lower-body exercises, the bridge places minimal stress on the knees and spine when performed correctly. This makes it a go-to choice in physical therapy, rehabilitation programs, strength training routines, and general fitness plans alike.
It is endorsed by sports medicine professionals and certified strength coaches as a foundational movement pattern that supports nearly every athletic and daily-life activity.
Muscles Worked During the Bridge Exercise
Understanding which muscles the bridge targets helps you perform it with greater intention and get more out of every repetition.
- Gluteus maximus: The primary mover. Your largest and most powerful glute muscle is responsible for lifting the hips off the floor and controlling the descent.
- Gluteus medius and minimus: These smaller glute muscles stabilize the hips throughout the movement, preventing the knees from caving inward.
- Hamstrings: The muscles along the back of your thighs assist in hip extension and help hold the position at the top of the bridge.
- Core muscles: Your transverse abdominis, obliques, and lower back extensors all work together to keep the torso stable and protect the spine.
- Hip flexors: These muscles are stretched at the top of the movement, which helps counteract the tightness that comes from prolonged sitting.
Because the bridge engages so many muscle groups simultaneously, it delivers strength, stability, and postural benefits that compound over time. If you want to explore more targeted exercise techniques and movement guides, you will find a wealth of practical resources to complement your training.
Benefits of the Bridge Exercise
The bridge exercise earns its place in almost every well-rounded fitness program because of the broad range of benefits it provides.
Improved Glute Strength and Activation
Many people suffer from underactive glutes due to long hours of sitting, a condition sometimes called gluteal amnesia. The bridge exercise directly addresses this by training the brain-to-muscle connection needed to fire the glutes effectively. Stronger glutes translate to better athletic performance, reduced injury risk, and improved posture.
Stronger, More Stable Core
The bridge requires constant core engagement to prevent the lower back from overextending at the top of the movement. This makes it a practical core strengthener that builds functional stability rather than just superficial abdominal tone.
Reduced Lower Back Pain
Weak glutes and poor hip stability are among the leading contributors to chronic lower back discomfort. By strengthening the posterior chain, the bridge helps reduce the muscular imbalances that often underlie back pain. Many physical therapists include glute bridges as a core component of back rehabilitation protocols.
Better Posture and Hip Alignment
Regular bridge training strengthens the muscles that support upright posture and proper pelvic alignment. Combined with the stretching effect on the hip flexors, this makes the bridge an excellent antidote to the postural problems caused by desk work and sedentary lifestyles.
No Equipment Required
One of the most practical advantages of the bridge exercise is that you need nothing but a floor and a few minutes. It fits into a home workout, a hotel room routine, or a warm-up before a gym session with equal ease.
How to Do the Bridge Exercise Correctly: Step-by-Step
Proper technique is the foundation of safe and effective training. Follow these steps carefully, especially when learning the movement for the first time.
Starting Position
- Lie flat on your back on a comfortable, firm surface such as a yoga mat or exercise mat.
- Bend your knees and place your feet flat on the floor, hip-width apart and about 12 to 16 inches from your glutes.
- Rest your arms alongside your body with palms facing down, or fold them across your chest.
- Relax your neck and press the back of your head lightly into the mat.
Performing the Movement
- Take a slow breath in to prepare.
- As you exhale, engage your core by gently drawing your navel toward your spine.
- Press firmly through your heels and squeeze your glutes as you lift your hips off the floor.
- Continue raising your hips until your body forms a straight line from your knees to your shoulders. Avoid hyperextending your lower back.
- Hold the top position for one to three seconds, maintaining tension in your glutes and core throughout.
- Slowly lower your hips back to the floor in a controlled manner. This is the eccentric phase and it is just as important as the lift.
- Allow your hips to briefly touch the mat before initiating the next repetition.
Sets and Repetitions for Beginners
For those new to the bridge exercise, starting with two to three sets of ten to fifteen repetitions is a practical and safe approach. Rest 30 to 60 seconds between sets. As your strength and endurance improve over two to four weeks, you can increase the number of repetitions, add a longer hold at the top, or progress to more challenging variations.
Common Mistakes and How to Fix Them
Even a simple exercise like the bridge can lose its effectiveness or cause discomfort when performed with poor form. Watch out for these frequent errors.
Overextending the Lower Back
Pushing the hips too high causes the lower back to hyperextend rather than maintaining a neutral spine. This shifts stress away from the glutes and onto the lumbar vertebrae. Fix this by focusing on squeezing the glutes rather than simply pushing upward as high as possible. Stop lifting when your body is in a straight diagonal line.
Letting the Knees Fall Inward or Flare Outward
The knees should track directly over the second toe throughout the movement. If they cave in, it indicates weak hip abductors. Placing a light resistance band just above the knees can serve as a tactile cue to keep them aligned.
Using the Lower Back Instead of the Glutes
If you feel the effort primarily in your lower back rather than your glutes, your foot placement may be off or your glute activation is insufficient. Try placing your feet slightly farther from your hips and consciously squeezing the glutes before and during the lift.
Holding Your Breath
Breath control is important for maintaining intra-abdominal pressure and core stability. Exhale as you lift and inhale as you lower. Never hold your breath during the exertion phase.
Bridge Exercise Variations to Progress Your Training
Once the standard glute bridge feels comfortable and controlled, introducing variations keeps the muscles challenged and prevents training plateaus.
Single-Leg Bridge
Extend one leg straight out and perform the bridge on the other leg alone. This dramatically increases the demand on the working glute and requires significantly more core stability to prevent hip dropping. Alternate legs each set.
Elevated Bridge
Place your feet on a stable elevated surface such as a bench or a sturdy box. The increased hip range of motion recruits more of the gluteus maximus and challenges the hamstrings more intensely. Ensure the surface is stable and at a comfortable height before loading the movement.
Banded Bridge
Loop a resistance band just above your knees and perform the standard bridge. The added external resistance forces your hip abductors to work harder throughout every repetition, improving lateral hip strength and knee tracking.
Weighted Bridge
Place a weight plate or a dumbbell across your hips, holding it in place with both hands. Begin with a light load and focus on maintaining proper form before increasing the resistance. This variation is a stepping stone toward the barbell hip thrust.
March Bridge
Hold your hips in the raised position and alternate lifting each knee toward your chest in a slow, controlled marching motion. This variation challenges your balance and forces the core to work hard to stabilize the pelvis.
Sample Weekly Schedule Using the Bridge Exercise
| Day | Exercise Focus | Bridge Variation | Sets x Reps |
|---|---|---|---|
| Monday | Lower Body Strength | Standard Bridge | 3 x 15 |
| Wednesday | Core and Stability | March Bridge | 3 x 10 each leg |
| Friday | Glute Focus | Single-Leg Bridge | 3 x 12 each leg |
| Sunday | Active Recovery | Standard Bridge (light) | 2 x 10 |
Who Should Do the Bridge Exercise?
The bridge exercise is appropriate for a remarkably wide range of people. Beginners benefit from its simplicity and low injury risk. Older adults find it valuable for maintaining hip strength and reducing fall risk. Pregnant individuals can often perform a modified version with their healthcare provider’s guidance, as it strengthens the pelvic floor and posterior chain without loading the spine.
Athletes use it as a warm-up activation drill and a supplemental strength movement. People recovering from certain lower back or hip injuries frequently use the bridge under the guidance of a physical therapist. However, if you have an existing injury or medical condition, always consult a qualified healthcare professional before beginning any new exercise program.
Tracking your overall health alongside your fitness progress is important, and tools like a BMI calculator can help you monitor your baseline metrics as part of a broader wellness picture.
How to Incorporate the Bridge Exercise Into Your Fitness Routine
The bridge works well in multiple contexts within a structured training program. As a warm-up, two to three sets of standard bridges activate the glutes before squats, deadlifts, or running, reducing the risk of compensation patterns and injury.
As a standalone exercise, it builds genuine posterior chain strength when performed with progressive overload over time. As a cool-down or mobility drill, gentle bridges help restore hip extension range of motion after long periods of sitting.
Combining the bridge with complementary movements such as clamshells, hip thrusts, Romanian deadlifts, and planks creates a comprehensive glute and core training program that produces visible and functional results.
For well-rounded guidance on health and wellness practices that support your training, explore a broad range of evidence-based resources to keep your entire lifestyle aligned with your fitness goals.
Frequently Asked Questions
How many bridges should I do per day?
For most beginners, two to three sets of ten to fifteen repetitions performed three to four days per week is sufficient to build meaningful glute and core strength. Allow at least one rest day between sessions to give the muscles time to recover and adapt. As your strength improves, you can gradually increase volume or progress to harder variations.
Can the bridge exercise help with lower back pain?
Yes, for many people the bridge exercise is specifically recommended by physical therapists to alleviate lower back pain caused by weak glutes and poor hip stability. By strengthening the posterior chain, it reduces the muscular imbalances that contribute to lumbar discomfort. However, if you have an acute injury or severe back pain, consult your doctor or physical therapist before performing bridges independently.
Is the bridge exercise the same as a hip thrust?
They are similar but not identical. The glute bridge is performed lying flat on the floor, while the hip thrust involves elevating the upper back on a bench, which allows for a greater range of hip motion and enables the use of heavier loads. The bridge is an excellent foundation and stepping stone toward mastering the barbell hip thrust.
How long does it take to see results from the bridge exercise?
Most people notice improved glute activation and reduced lower back tension within two to four weeks of consistent practice. Visible changes in glute strength and shape typically emerge within six to twelve weeks when the bridge is performed regularly alongside a balanced diet and overall active lifestyle.
Can I do the bridge exercise every day?
The standard bodyweight bridge is relatively low intensity and can be performed daily by most healthy individuals, particularly as an activation or mobility drill. However, if you are adding resistance or working at higher intensities, allowing 48 hours of recovery between sessions is generally advisable to support muscle repair and growth.
What is the correct foot position for the bridge exercise?
Your feet should be placed hip-width apart with your heels approximately 12 to 16 inches from your glutes. When your hips are lifted, your shins should be roughly vertical. If you feel more hamstring than glute engagement, try moving your feet slightly closer to your hips. If you feel cramping in the hamstrings, move them slightly farther away.
Can beginners do the bridge exercise?
Absolutely. The standard bodyweight bridge is one of the most beginner-friendly strength exercises available. It requires no equipment, places minimal stress on the joints, and can be scaled easily by adjusting the number of repetitions, hold duration, or by progressing to more challenging variations as strength improves over time.
Is the bridge exercise good for posture?
Yes, consistently performing the bridge exercise strengthens the glutes, hamstrings, and core muscles that support upright posture and proper pelvic alignment. It also stretches the hip flexors at the top of the movement, helping to counteract anterior pelvic tilt and the postural issues that come from extended periods of sitting at a desk or in a vehicle.
What should I feel during the bridge exercise?
You should primarily feel the work in your glutes, which should be firmly contracted at the top of the movement. You will also feel engagement through your hamstrings and core. If you feel the effort mainly in your lower back or thighs, adjust your foot position, focus on deliberately squeezing the glutes before lifting, and check that you are not pushing your hips beyond a neutral spine position.
Can the bridge exercise be done during pregnancy?
Many healthcare providers approve of the glute bridge during pregnancy, particularly in the first and second trimesters, because it strengthens the glutes and pelvic floor without loading the spine. However, individual circumstances vary significantly, so always consult your obstetrician or midwife before beginning or continuing any exercise program during pregnancy.